In this post on OpenAI and Microsoft Power Apps, we will create a Text-to-Speech Power App using OpenAI Whisper.
OpenAI whisper is OpenAI’s Text-to-Speech service, offering human-like natural voice (5 options to choose from) and the ability to convert to audio.
The Power App integrates with Power Automate and makes HTTP calls to OpenAI using REST API. For this to work, you will need a paid OpenAI account with credit to call the API.
Creating a Text-to-Speech Power App Using OpenAI Whisper
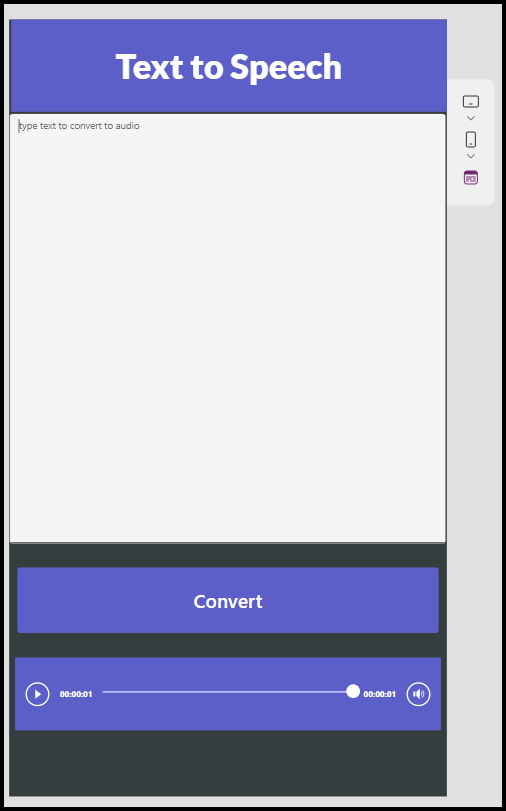
The following screenshot shows what the application looks like. The design uses the Microsoft Teams theme that is available in Power Apps.
Get an API Key from OpenAI
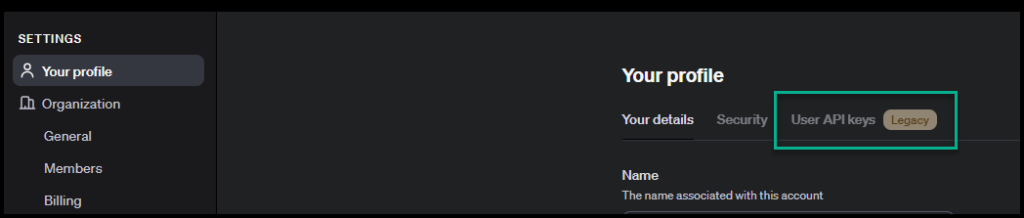
The first step in the process is to get an API Key from OpenAI. The API Key allows us to programmatically access the OpenAI service. To get a key, log in to OpenAI.
Click on Your Profile link
Select Use API Keys (Note, OpenAI switched to Project API Keys)
Create an API Key and save it for later.
After creating the key, we need to create a Power App and a Power Automate flow that sends a POST HTTP request to OpenAI with a text the Power App will provide.
Creating a Text-to-Speech Power App
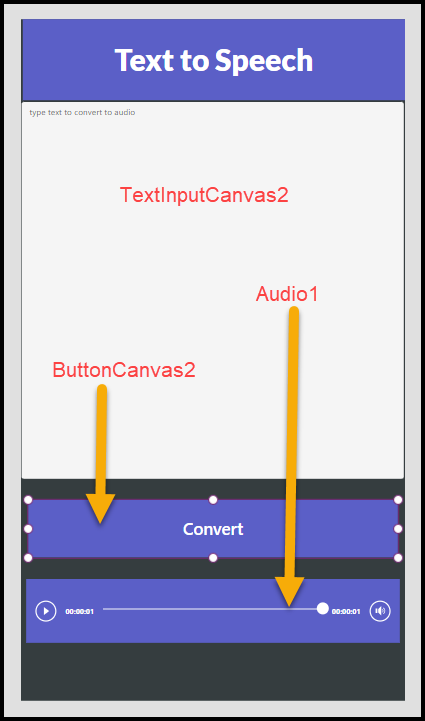
From the Power Apps portal, create a new Tablet or Mobile application. In our case, we selected a Mobile application with three controllers.
- TextInput Canvas (Multilines)
- Button Canvas
- Audio Player
Create Power Automate Flow
We need to create a Power Automate flow for the Power App to call OpenAI Whisper and pass in the text to convert to audio.
Click on Power Automate from the Power App and create a new flow.
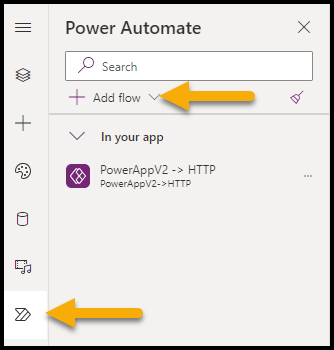
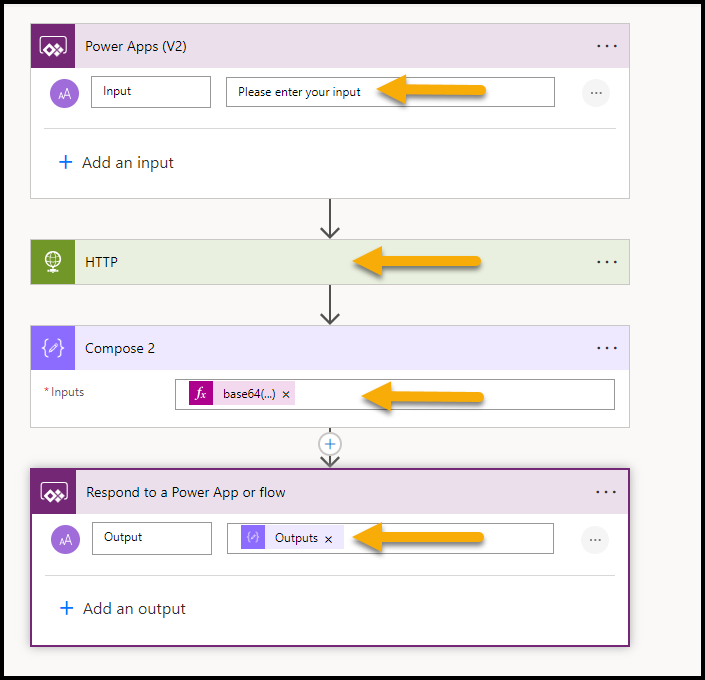
In the Power Automate flow, we have four steps that help us convert text to speech.
- Input – This is the input (text) from the Power App that I will add as a variable to the body of the POST request to OpenAI.
- HTTP Request – This HTTP POST request sends the input to OpenAI and uses an API Key. In our other blog, we explained how to create an HTTP request from Power Automate.
- Convert the body to Base64 string
- Pass the audio back to the Power App.
HTTP Request
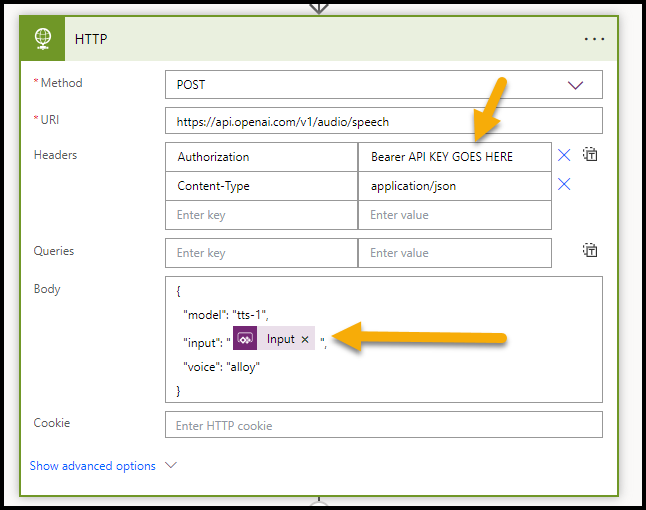
As explained above, we are using a POST request to send the input from the Power App to OpenAI. Below you can see the request and the properties.
- Method – POST
- URI – https://api.openai.com/v1/audio/speech
- authorization – Bearer API KEY
- Content-Type – application/json
- Body – See code below.
{
  "model": "tts-1",
  "input": "@{triggerBody()['text']} ",
  "voice": "alloy"
}
Convert Body
We use Compose with the following expression to convert the POST response to Base64 file.
base64(body('HTTP'))Pass Audio back to Power App
In the last step of the flow, we return an audio file to the power app or flow using the following step, which is the Respond to a Power App or flow task.

Power App Functions
At this stage, we have all the important parts of the application working, and the only thing missing is the passing of text and the return of an audio file to the app. These two components are critical because they are the front-end parts of the application.
Convert Button
For the Convert button to work and pass the text to the Power Automate flow, we use the following function in the OnSelect event.
Set(xvar,'PowerAppV2->HTTP'.Run(TextInputCanvas2.Value))
Note: xvar is a parameter we for the return audio file.
Audio Player Controller
Finally, we use the following code for the Media event in the Audio Player controller.
"data:audio/x-wav;base64,"&xvar.output
To test, Save and run the application.
Summary
This article covered multiple technical components, including OpenAI, Power Apps, REST API, and Power Automate.
1 thought on “Creating a Text-to-Speech Power App Using OpenAI Whisper”